TL;DR:
- Preventing bubbles during emblem overlay installation relies on thorough surface cleaning, proper alignment, and working patiently, especially in moderate temperatures.
- Using the right tools, such as isopropyl alcohol, microfiber cloths, and a squeegee, helps achieve a smooth, bubble-free finish.
- Careful prep, correct technique, and patience are key to a professional-looking, long-lasting result on Subaru and Ford emblems.
You spent good money on a sharp emblem overlay for your Subaru or Ford, and then you peel back the liner, press it on, and — bubbles. It's one of the most frustrating things you can run into when customizing your vehicle, and it happens more often than it should. The good news is that bubbles are almost always preventable. With the right prep, a steady hand, and a few proven techniques, you can get a glass-smooth finish every single time. This guide walks you through the complete process from gathering tools to long-term maintenance.
Table of Contents
- What you'll need: Tools and materials checklist
- Prep right: Cleaning and surface preparation
- Applying your emblem overlay: Bubble-free technique
- Troubleshooting: How to fix emblem overlay bubbles
- Maintenance tips and results: Keeping overlays bubble-free
- Our take: The real secret to smooth emblem overlays
- Ready for a flawless overlay? Get a pro look today
- Frequently asked questions
Key Takeaways
| Point | Details |
|---|---|
| Surface prep matters | Thorough cleaning and drying before install is the #1 way to avoid emblem overlay bubbles. |
| Apply with care | Use slow alignment, correct pressure, and a squeegee from the center or edge for best results. |
| Fixing bubbles is easy | Small bubbles can be punctured or heated and smoothed—no need to redo your whole overlay. |
| Maintenance prevents issues | Regular cleaning and edge checks keep your overlays smooth and long-lasting. |
What you'll need: Tools and materials checklist
Now that you know the goal, let's get started with the right materials. Walking up to your car without the right supplies is a fast track to bubbles and frustration. Before you even think about touching your emblem, gather everything on this list. Emblem prep basics starts with having the right gear on hand, and it makes a bigger difference than most people realize.
Essential tools and materials
- Isopropyl alcohol (70% or 90%): Removes grease, oils, and residue that would trap air under your overlay
- Microfiber cloths (lint-free): Won't leave fibers that cause micro-bumps
- Squeegee or credit card: For pushing out air during application
- Your emblem overlay: Choose the right design and size for your specific Subaru or Ford emblem
- Nitrile gloves: Keeps fingerprint oils off the freshly cleaned surface
- Hair dryer or heat gun (low setting): Useful for curved emblems and stubborn bubbles post-application
- Masking tape: Helps you align the overlay perfectly before committing
Cleaning car emblems properly before application is one of the most overlooked steps. That's why having the right cleaning supplies in your kit isn't optional — it's the foundation of a bubble-free result.
| Tool or material | Purpose | Notes |
|---|---|---|
| Isopropyl alcohol | Degrease and disinfect surface | Crucial for preventing dirt-caused bubbles |
| Microfiber cloth | Apply IPA and dry surface | Use lint-free only |
| Squeegee or credit card | Push out air during install | Wrap in microfiber for vinyl protection |
| Nitrile gloves | Prevent oil transfer | Swap for fresh pair if torn |
| Hair dryer | Warm vinyl for curves and bubble fixes | Use low heat setting only |
| Masking tape | Alignment guide | Remove slowly to avoid emblem scratches |
| Emblem overlay | The star of the show | Confirm fitment for your specific vehicle |
Starting the process with everything ready keeps you focused and moving efficiently. Stopping mid-install to hunt for a squeegee is how bubbles sneak in.
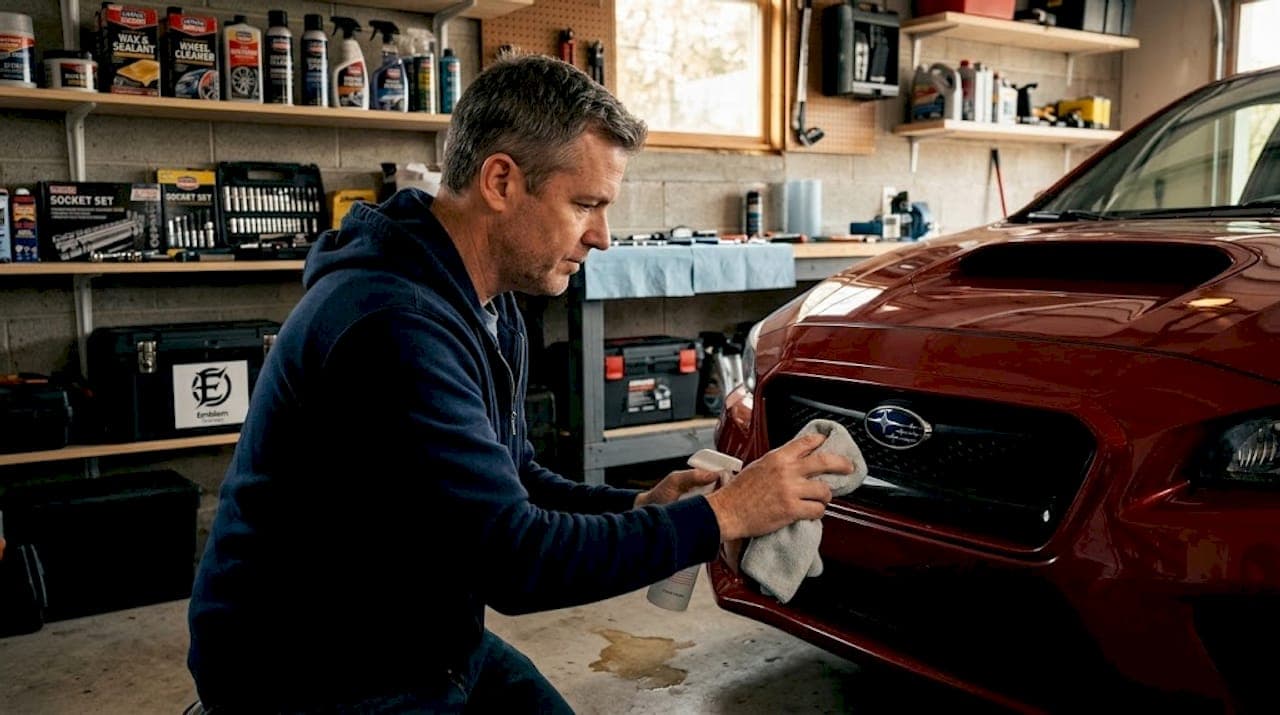
Prep right: Cleaning and surface preparation
With your tools ready, let's make sure your emblem surface is 100% clean and prepped. This is the step most people rush, and it's the single biggest reason overlays bubble up. Dirt, grease, and moisture prevent proper adhesion, which often leads to trapped air. Skipping or rushing this step causes problems that no amount of squeegeeing will fix.
Step-by-step cleaning process
- Wash the emblem area first. Use mild car soap and water to remove surface-level grime. Rinse thoroughly and let it air dry for a few minutes.
- Degrease with isopropyl alcohol. Dampen a clean microfiber cloth with IPA and wipe the emblem surface in one direction. Don't scrub in circles — that can push contaminants into small crevices.
- Wipe again with a dry lint-free cloth. Remove any remaining moisture and loosened particles. The surface should look almost glossy when dry.
- Let the emblem dry completely. This is non-negotiable. Moisture under vinyl is one of the most common causes of bubbles and early lifting. Give it at least 5 to 10 minutes in a dry, shaded area.
- Put on your nitrile gloves. Once the surface is clean, treat it like a touchscreen you just wiped down. Any new contact with bare hands re-introduces oils.
Use these vinyl surface prep tips to confirm you're not missing anything specific to emblem overlays on raised or contoured surfaces.
Pro Tip: Work in the shade or indoors when possible. Direct sunlight heats the emblem surface and causes the vinyl to grab too fast, making it nearly impossible to adjust before bubbles form.
Critical note: Microscratches and old adhesive residue are hidden bubble traps. If your emblem has an old overlay or decal, fully remove it and clean the surface before applying anything new. Rushing past this step is the number one cause of failed installs. Every minute you invest in cleaning your emblem for overlays is a minute saved on troubleshooting later.
Temperature matters too. Applying overlays in extreme cold or heat makes vinyl less cooperative. A moderate temperature range, roughly between 60°F and 80°F, is ideal. Cold vinyl is stiff and prone to air pockets at the edges, while overly hot conditions cause it to stretch before you're ready.
Applying your emblem overlay: Bubble-free technique
Once your surface is perfectly prepped, it's time for careful, bubble-free application. This is where technique separates a professional-looking finish from a bumpy mess. Read through all the steps before you start, because once the adhesive makes contact with the emblem surface, you have very little time to reposition.
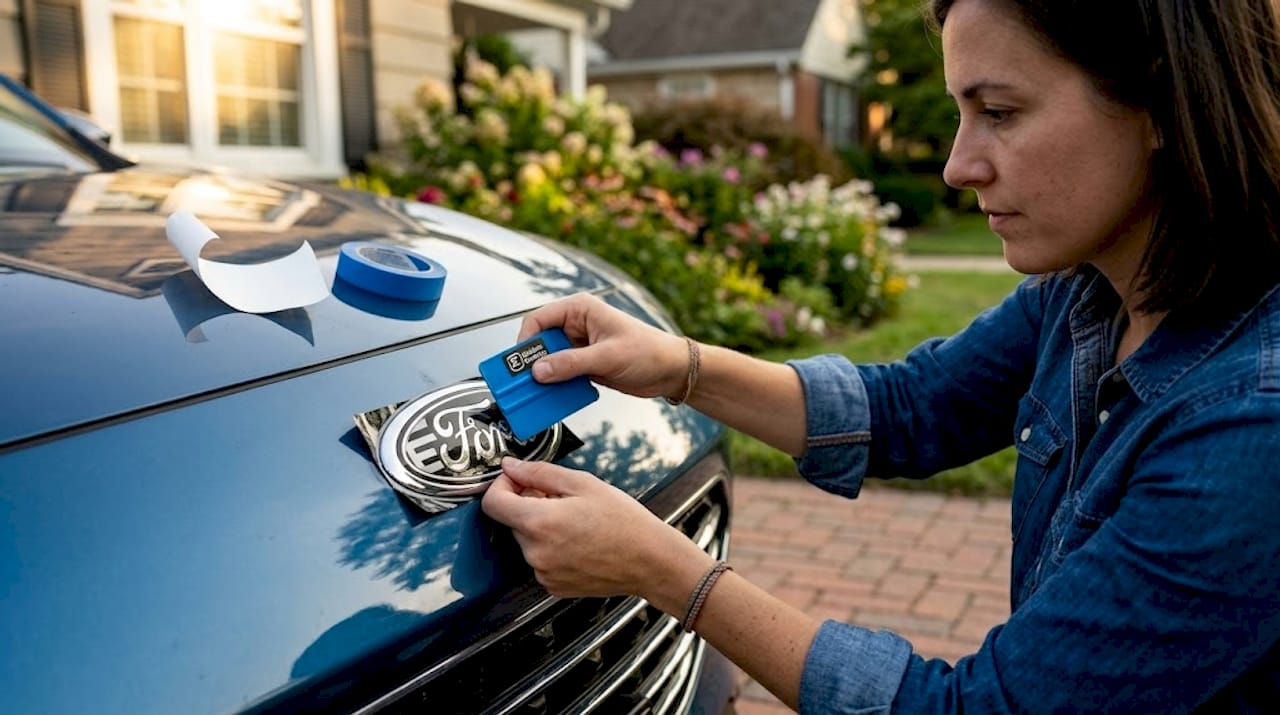
Step-by-step application
- Dry-fit the overlay first. Hold it over the emblem without peeling the liner. Confirm the sizing and position. Use masking tape as a hinge on one edge if you need a reference point for alignment.
- Peel back only a small section of the liner. Don't strip the whole liner off at once. Start from one edge or the center, depending on your emblem's shape.
- Place the exposed edge and press lightly. Lock in one anchor point before moving further.
- Gradually peel and press, working in one direction. Use your squeegee or credit card to press out air as you go, moving from the already-stuck area outward.
- Apply firm, overlapping strokes with the squeegee. Think of it like pressing wrinkles out of a sticker — slow, firm, and methodical. A squeegee or microfiber-wrapped card forces out trapped air while protecting the vinyl surface.
- Seal the edges last. Press down the perimeter firmly with your fingernail or the edge of the squeegee. This is what stops future lifting and bubble formation along the border.
Apply the overlay slowly, align first, and use a squeegee or card from the center outward to avoid trapping air as the vinyl lays down. Rushing this step is almost always what causes bubbles.
Pro Tip: If your Subaru or Ford emblem has a curved or domed surface, use a hair dryer on low heat to gently warm the vinyl for 10 to 15 seconds before pressing. Warm vinyl conforms to curves more easily without stretching or wrinkling.
Refer to this vinyl overlay positioning guide for model-specific tips, and follow the stepwise overlay process if you want a more detailed breakdown by emblem type.
Dry vs. wet application: A quick comparison
| Method | Pros | Cons | Best for |
|---|---|---|---|
| Dry application | Faster, more immediate adhesion | Less repositioning time | Flat or low-contour emblems |
| Wet application | Allows repositioning, reduces instant sticking | Requires full drying after install | Curved or contoured emblems |
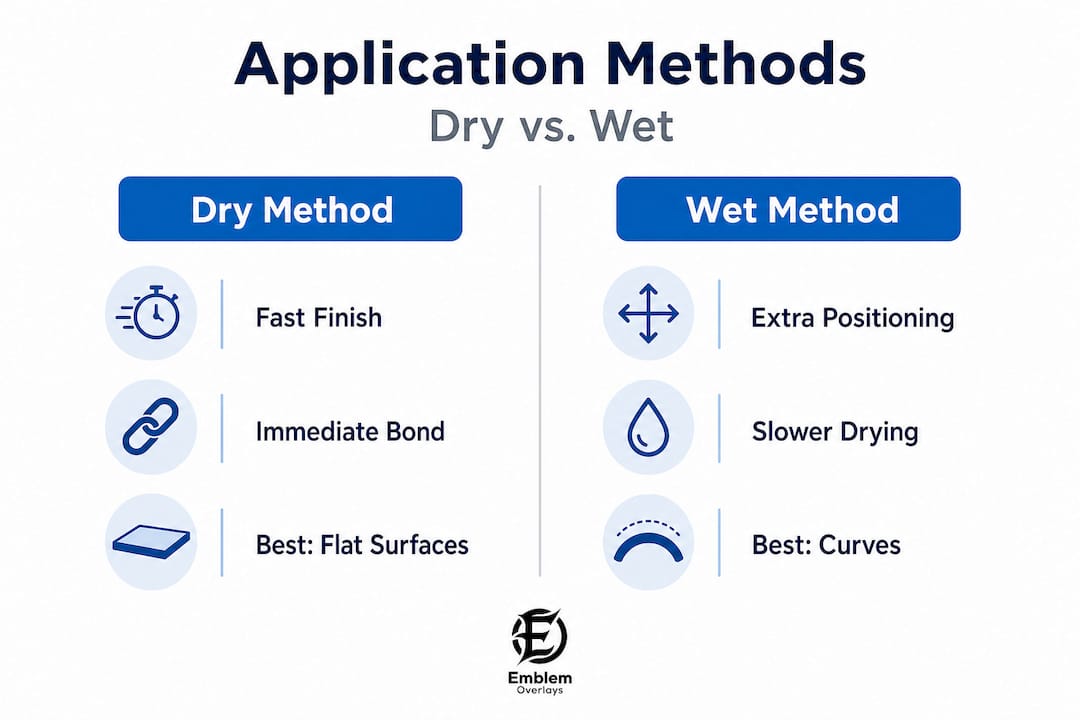
Wet application (using a tiny mist of water and dish soap solution) gives you more time to adjust alignment on tricky surfaces. But here's the catch: every drop of moisture must evaporate before you call it done, or bubbles will form as the water tries to escape.
Troubleshooting: How to fix emblem overlay bubbles
Even with care, bubbles sometimes pop up — fixing them is usually simple with a few expert techniques. Don't panic if you see a small air pocket after install. Most minor bubbles can be fixed without removing the overlay entirely.
Common fixes for overlay bubbles
- Small isolated bubbles: Use a fine sewing needle or pin to make a tiny puncture at the edge of the bubble. Then press the air out toward the hole with your fingertip. The puncture is nearly invisible once the vinyl settles.
- Stubborn micro-bubbles: Apply gentle heat from a hair dryer for 10 to 15 seconds, then immediately press down with a soft cloth or your fingertip. Heat softens the adhesive and lets it conform to the surface.
- Edge bubbles or lifting: These need prompt attention. Press the edge down firmly and apply heat if needed. If the edge keeps lifting, use a small amount of vinyl-safe adhesive to re-secure it.
- Large bubbles or bubbles in the center of the overlay: These usually signal a preparation issue. If the bubble is bigger than a pencil eraser, the best fix is to remove the overlay, clean the surface again, and reapply a fresh overlay.
Puncture with a pin and press the air out, or heat with a hair dryer then smooth down. This two-step technique handles the majority of post-install bubble problems quickly.
Statistic callout: Industry installers consistently report that the vast majority of overlay and vinyl application errors trace back to inadequate surface prep or inconsistent squeegee pressure — not to product defects. That means most bubbles are 100% preventable with better technique.
For long-term help, check these overlay maintenance tips to catch early issues before they grow.
Maintenance tips and results: Keeping overlays bubble-free
Once installed and fixed, maintaining your overlays is simple but important. A smooth, sharp overlay is easy to keep that way if you give it a little routine attention.
How to keep your emblem overlay looking flawless
- Hand wash around the emblem when possible. High-pressure automatic car washes can lift overlay edges over time, especially in the first few weeks after install.
- Avoid harsh chemical cleaners. Products with petroleum-based ingredients can weaken the vinyl's adhesive. Stick to mild, vinyl-safe soap.
- Check the edges regularly. Once a month, run a fingernail lightly around the perimeter. If you feel any lifting, press it back down firmly or apply gentle heat.
- Inspect in different lighting. After install, check your overlay in direct sunlight and shade. Bubbles that are invisible under artificial light often show up clearly outdoors. This is the real-world quality check.
- Re-seal lifted edges promptly. The best practice for vinyl emblems is to heat the vinyl, squeegee from center outward, and seal edges to minimize air pockets. Doing this as part of ongoing maintenance keeps the overlay tight.
Follow these overlay maintenance steps to get the most out of your investment and keep your Subaru or Ford looking its best year-round.
Well-maintained overlays can last for years without bubbling, fading, or peeling when you use quality vinyl and follow through with consistent care.
Our take: The real secret to smooth emblem overlays
After seeing thousands of installs and hearing from Subaru and Ford owners across the country, we can tell you honestly — the secret to a bubble-free overlay has nothing to do with buying the most expensive tools or the thickest vinyl. It's about patience.
The single biggest mistake people make is rushing the prep. They spend five minutes cleaning instead of fifteen, skip the second IPA wipe, or apply the overlay in a hot parking lot because they can't wait to see the result. Then bubbles form, they're frustrated, and they assume something was wrong with the product. Almost always, the problem was the process.
Here's the counter-intuitive part: slowing down actually saves time. A careful 20-minute install beats a hasty 8-minute install followed by an hour of troubleshooting and a second trip to order a replacement overlay.
Wet application is worth knowing, but we'd caution against reaching for it as a shortcut on standard flat or slightly curved emblems. It works best for deeply contoured surfaces, and only when you follow through with complete drying. Skipping the drying step after a wet application almost guarantees late-forming bubbles that appear days after install.
We also tell people to do the sunlight check before calling the job done. Step back and look at your emblem from different angles in direct light. A bubble you missed indoors will catch your eye every time you walk past the car. Fix it while the adhesive is still relatively fresh and the vinyl is easy to work with.
The car customization trends point toward cleaner, more refined installs — and that's exactly what you get when you treat prep as the real skill, not the application itself.
Ready for a flawless overlay? Get a pro look today
With your bubble-free technique set, you're ready to find overlays that bring your style to life.
We design emblem overlays specifically for Subaru and Ford vehicles, with hundreds of designs to choose from including all 50 state flags. Every overlay is made to fit your factory emblem precisely, so you spend less time fussing with alignment and more time enjoying the result.

Browse our full collection at embleminlays.com and find the design that matches your personality. If you want to go deeper on getting the best possible finish, our vehicle aesthetics guide walks you through design choices, placement, and how to get results that genuinely turn heads. The right overlay, installed with the right technique, is one of the easiest and most satisfying upgrades you can make to your vehicle.
Frequently asked questions
What causes bubbles in emblem overlays?
Bubbles are usually caused by dirt, grease, or moisture that prevent the adhesive from bonding properly, trapping air beneath the overlay. Hasty application without proper squeegee technique is also a major contributing factor.
Can I fix air bubbles without removing the overlay?
Yes — puncture with a needle and press the air out, or use a hair dryer to soften the vinyl then smooth it down firmly. Most small bubbles respond well to this method without any need to remove the overlay.
Is wet application better for tricky emblem overlays?
Wet application allows you to reposition vinyl on contoured surfaces, but all moisture must be removed and the overlay fully dried before you can accurately judge whether bubbles remain. It's a helpful technique for specific situations, not a universal fix.
Does temperature affect overlay bubble formation?
Yes — applying overlays in moderate temperatures and using gentle heat on curves improves adhesion and reduces the chance of trapped air, especially along contoured edges where vinyl is prone to bridging rather than conforming.