Every Subaru and Ford that rolls off the lot looks exactly the same as the one parked next to it. Same badge, same finish, same factory look. If you've ever glanced at your emblem and thought "this should be more me," you're not alone. Vinyl emblem overlays are the fastest, most affordable way to change that. They fit directly over your factory emblem, require zero drilling or permanent modification, and come in hundreds of designs including every state flag. This guide walks you through the full process, from gathering your tools to caring for your finished overlay, so your first install looks like your tenth.
Table of Contents
- What you need for a professional vinyl emblem overlay
- Step-by-step vinyl emblem overlay application
- Troubleshooting and avoiding common mistakes
- Caring for your emblem overlays for lasting results
- A car enthusiast's take on vinyl overlays: what really matters for Subaru and Ford individuality
- Take your customization further with premium emblem overlays
- Frequently asked questions
Key Takeaways
| Point | Details |
|---|---|
| Preparation is crucial | Cleaning and proper setup make a flawless overlay finish possible. |
| Follow step-by-step application | Using a systematic process ensures a smooth and professional appearance. |
| Fix issues quickly | Bubbles or misalignment are easy to correct if addressed right away. |
| Care extends lifespan | Well-maintained overlays look new and last for years. |
What you need for a professional vinyl emblem overlay
Good results start before you ever touch the overlay. Rushing into the application without the right tools or environment is the number one reason installs go wrong. Think of this phase as setting the stage. If the stage is messy, the performance suffers.
Here's everything you need to have on hand before you start:
| Tool or material | Purpose |
|---|---|
| Vinyl emblem overlay | The custom piece that fits over your factory badge |
| Isopropyl alcohol (70% or higher) | Removes oils, wax, and residue from the emblem surface |
| Microfiber cloth | Lint-free wiping to avoid leaving debris behind |
| Plastic squeegee or credit card | Smoothing the overlay and pressing out air bubbles |
| Masking tape | Holding the overlay in position during alignment |
| Heat gun or hair dryer | Softening the vinyl for better conformity on curved emblems |
| Tweezers | Precision handling of small overlay edges |
| Good lighting | Spotting dust, bubbles, and misalignment before they set |
Beyond tools, your environment matters just as much. Work indoors in a clean, dust-free space. A garage with the door closed beats a driveway every time. Dust particles that land on the adhesive side of the overlay before it's applied will create tiny bumps you can't fix later. Aim for a room temperature between 65°F and 80°F for best adhesion.
For your Subaru and Ford overlay guide, surface prep is the foundation everything else is built on. Proper prep includes cleaning the emblem to ensure the adhesive bonds fully and evenly. Skip this step and even a premium overlay will lift at the edges within weeks.
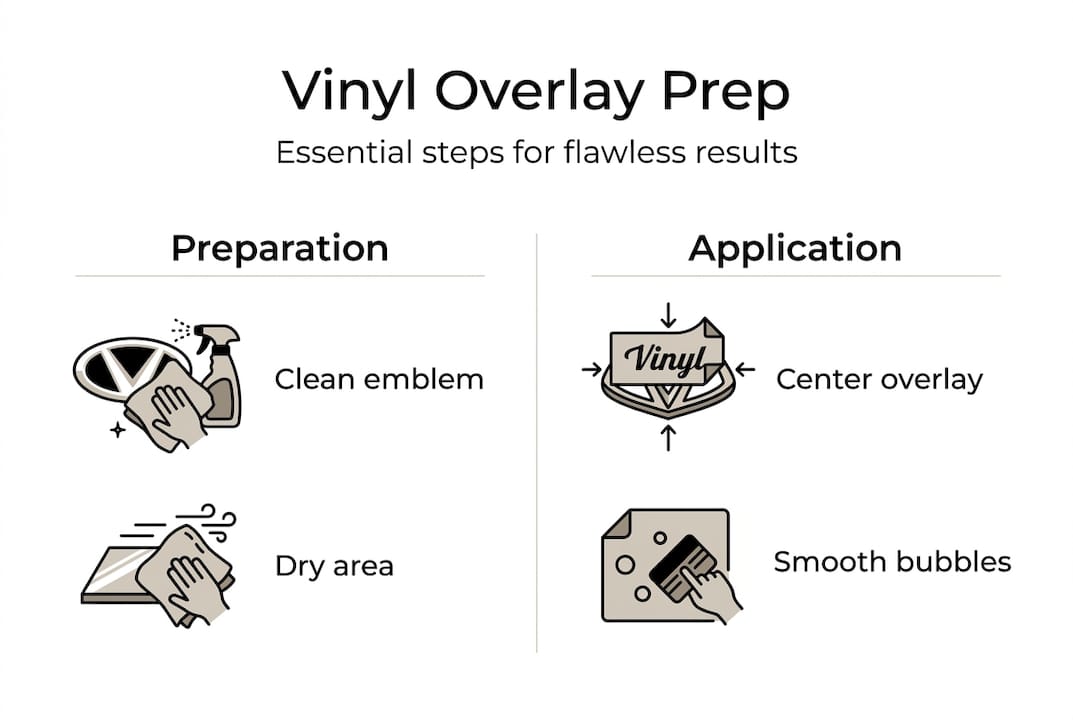
Pro Tip: Use isopropyl alcohol on a fresh microfiber cloth and wipe the emblem in one direction only. Going back and forth can redeposit oils onto the surface. Let it air dry for 60 seconds before touching anything.
Quick checklist before you begin:
- Emblem is clean, dry, and free of wax or polish
- Work area is indoors and dust-free
- Room temperature is between 65°F and 80°F
- All tools are within arm's reach
- Overlay is the correct size and design for your specific vehicle
- Hands are clean and dry
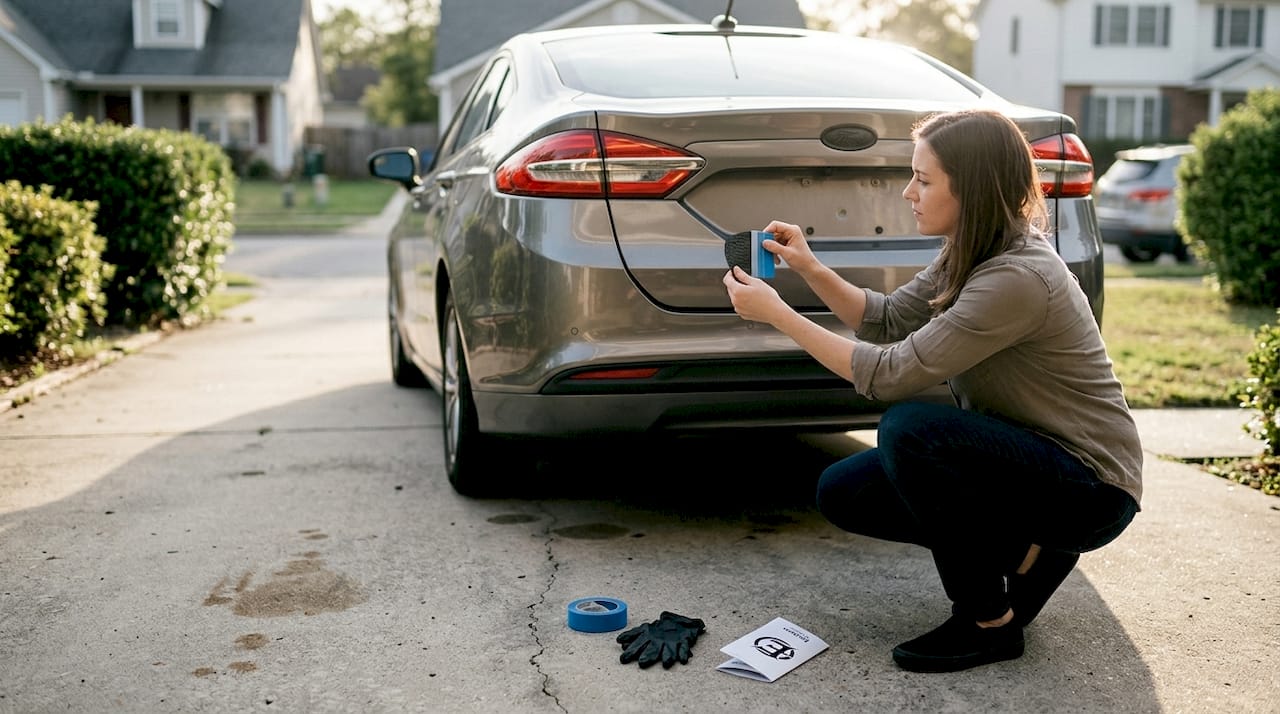
Step-by-step vinyl emblem overlay application
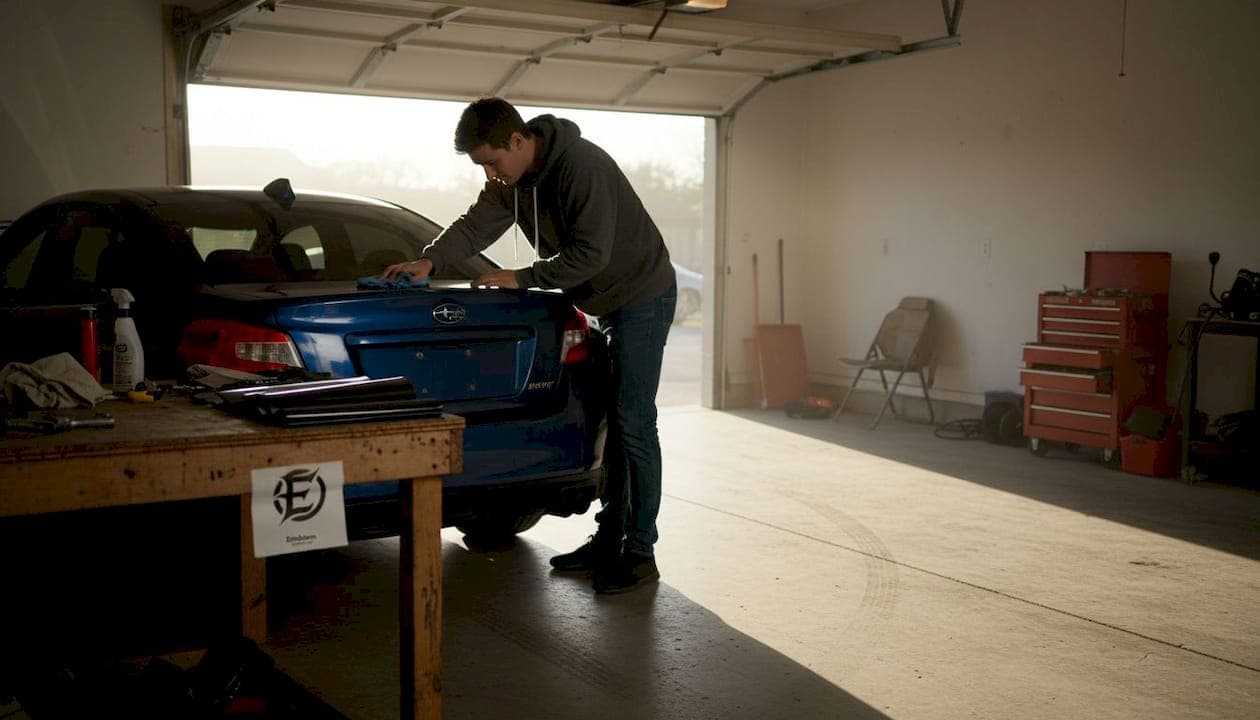
With everything ready, you're set to begin the actual application process. Take your time here. A careful, methodical approach gives you a result that looks factory-installed rather than DIY.
Applying an overlay in the right sequence is key to a professional finish. Follow these steps in order:
- Do a final dust check. Right before you start, wipe the emblem one more time with a clean microfiber cloth. Even in a clean room, dust settles fast.
- Dry-fit the overlay. Place the overlay over the emblem without removing the backing. Confirm it aligns correctly on all sides. This is your chance to spot any sizing issues before adhesive is involved.
- Tape one edge as a hinge. Use masking tape along one side of the overlay to hold it in place. This creates a hinge so you can lift and lower the overlay precisely without it shifting.
- Peel back half the backing. Fold the release liner back halfway, exposing the adhesive on one side only. Do not touch the adhesive.
- Lower and press from the center outward. Starting at the center of the exposed half, press the overlay down gently. Work outward toward the edges using your fingertip or squeegee.
- Remove the remaining backing. Once the first half is set, carefully peel the rest of the liner and press the remaining section down the same way.
- Squeegee out all air bubbles. Use your plastic squeegee or a credit card wrapped in a microfiber cloth. Work from the center toward the edges using firm, even pressure.
- Apply gentle heat if needed. For emblems with curves or raised edges, a quick pass with a hair dryer on low heat softens the vinyl and helps it conform without tearing.
- Inspect from multiple angles. Check under different lighting for bubbles, lifted edges, or misalignment. Press down any problem spots immediately.
Caution: Never stretch the overlay to make it fit. Pulling the vinyl distorts the design and weakens the adhesive bond. If it doesn't align, reposition before pressing down fully.
Pro Tip: If a bubble won't move with the squeegee, use a fine pin to make a tiny hole at the bubble's edge, then press the air out gently. The hole becomes invisible once the vinyl settles.
The way overlays enhance your car's look is directly tied to how cleanly they're installed. Patience during steps 5 through 7 is what separates a sharp, professional result from a bubbly, uneven one.
Troubleshooting and avoiding common mistakes
Sometimes, even with good preparation, issues crop up during application. Knowing what causes each problem means you can fix it fast or avoid it entirely.
| Problem | Likely cause | Quick fix |
|---|---|---|
| Air bubbles | Pressing too fast or trapping dust | Squeegee outward from center; use pin for stubborn bubbles |
| Lifted edges | Residue left on emblem surface | Press edge firmly; apply gentle heat to reactivate adhesive |
| Misalignment | Skipping the dry-fit step | Peel back slowly and reposition before fully pressing down |
| Wrinkles or creases | Overlay stretched during application | Warm with hair dryer and smooth outward carefully |
| Poor adhesion | Cold temperature or oily surface | Re-clean with isopropyl alcohol; work in warmer conditions |
Proper overlay technique prevents air bubbles and peeling edges. Most problems trace back to two root causes: a surface that wasn't clean enough, or an installer who moved too quickly.
Best practices for first-time installers:
- Always do the dry-fit before removing any backing
- Work in sections, never try to press the whole overlay at once
- Keep a clean microfiber cloth nearby throughout the process
- Avoid touching the adhesive side with bare fingers
- Use the hinge tape method every single time, even if it feels unnecessary
Pro Tip: If you accidentally stretch the overlay during positioning, don't panic. Gently lift it back up before you've fully pressed it down. Vinyl has some memory, and light repositioning before burnishing rarely causes permanent damage.
For ongoing reference, the guide on cleaning emblems for adhesion is worth bookmarking. And if you want to understand the broader scope of auto emblem protection, that context helps you treat overlays as a long-term investment rather than a quick fix.
Caring for your emblem overlays for lasting results
After a successful application, keeping your overlays sharp and intact over time is simple. The effort you put into installation shouldn't be wasted by using the wrong cleaning method six months later.
Proper care significantly extends the life of vinyl overlays. Most overlays last three to five years with basic maintenance, which makes them one of the best value-to-impact customization options available for Subaru and Ford owners.
Here's how to keep them looking great:
Do's:
- Hand-wash the emblem area with mild car soap and water
- Pat dry with a clean microfiber cloth after washing
- Apply a UV-protective detailer spray over the overlay every few months
- Inspect edges monthly and press down any that begin to lift
- Use a soft-bristle brush for crevices around raised emblem edges
Don'ts:
- Avoid automatic car washes with high-pressure jets or stiff brushes
- Don't use harsh chemical degreasers or solvent-based cleaners near the overlay
- Skip abrasive polishing compounds anywhere near the vinyl
- Don't let bird droppings or tree sap sit on the overlay for extended periods
- Avoid pressure washing directly at the overlay edges
If an edge begins to lift slightly, press it back down firmly after warming it with a hair dryer for a few seconds. This reactivates the adhesive and usually solves the problem without needing a replacement. For scratches on the surface, a small piece of matching overlay material can be trimmed and placed over the damaged spot as a patch.
Exploring the full range of Ford emblem overlay types can also help you plan future updates, since different finishes and materials have slightly different care requirements.
A car enthusiast's take on vinyl overlays: what really matters for Subaru and Ford individuality
Here's something the customization community doesn't say enough: the mods that get the most compliments are rarely the loudest ones. A lowered suspension or a loud exhaust gets noticed once. A perfectly installed emblem overlay in your state flag design gets noticed every time someone walks past your car in a parking lot.
There's a reason automotive personalization matters more now than ever. People want their vehicles to reflect who they are, not just what they drive. Emblem overlays do that quietly and precisely.
What separates a great overlay install from a generic sticker slapped on a bumper is the precision. When the overlay fits the exact contour of your factory badge and the finish matches your vehicle's trim, it looks intentional. It looks like it came that way. That's the goal. And honestly, the satisfaction of noticing a detail only you know you changed? That's its own reward. It doesn't need to be flashy to be meaningful.
Take your customization further with premium emblem overlays
Now that you know the full process, the next step is choosing an overlay worth installing. The quality of the vinyl, the accuracy of the cut, and the design selection all determine whether your finished result looks premium or just passable.
At Emblem Inlays, we make premium emblem overlays specifically for Subaru and Ford vehicles, with hundreds of designs including every state flag. Every overlay is precision-cut to fit your factory badge exactly. If you want something that reflects your home state, your style, or just something no one else on the road has, browse our full collection of handmade overlay options and find the one that fits your personality as well as it fits your car.
Frequently asked questions
Will a vinyl emblem overlay damage my factory emblem?
No, properly installed vinyl overlays are removable and do not damage your original emblem if removed carefully and slowly.
How do I remove air bubbles from my overlay?
Use a soft squeegee or your finger wrapped in a microfiber cloth to push bubbles outward. Best practices for bubble removal include working from the center toward the edges before the adhesive fully sets.
How long do vinyl emblem overlays last?
Most overlays last three to five years with proper cleaning and basic upkeep, making them a durable and cost-effective customization.
Can overlays be applied in cold weather?
It's best to apply overlays in temperatures above 60°F. Environmental conditions impact adhesion, and cold vinyl is stiffer and harder to conform to curved surfaces.
Is special cleaning needed before overlay installation?
Yes, thoroughly clean and dry your emblem with isopropyl alcohol before installing. Proper cleaning ensures a strong bond and prevents early lifting or peeling.