TL;DR:
- Proper cleaning and prep are essential for long-lasting overlay adhesion and a sharp look.
- Use gentle tools, avoid harsh chemicals, and thoroughly remove residue before applying overlays.
- Regularly maintain emblems every few months to keep them looking fresh and to preserve vehicle aesthetics.
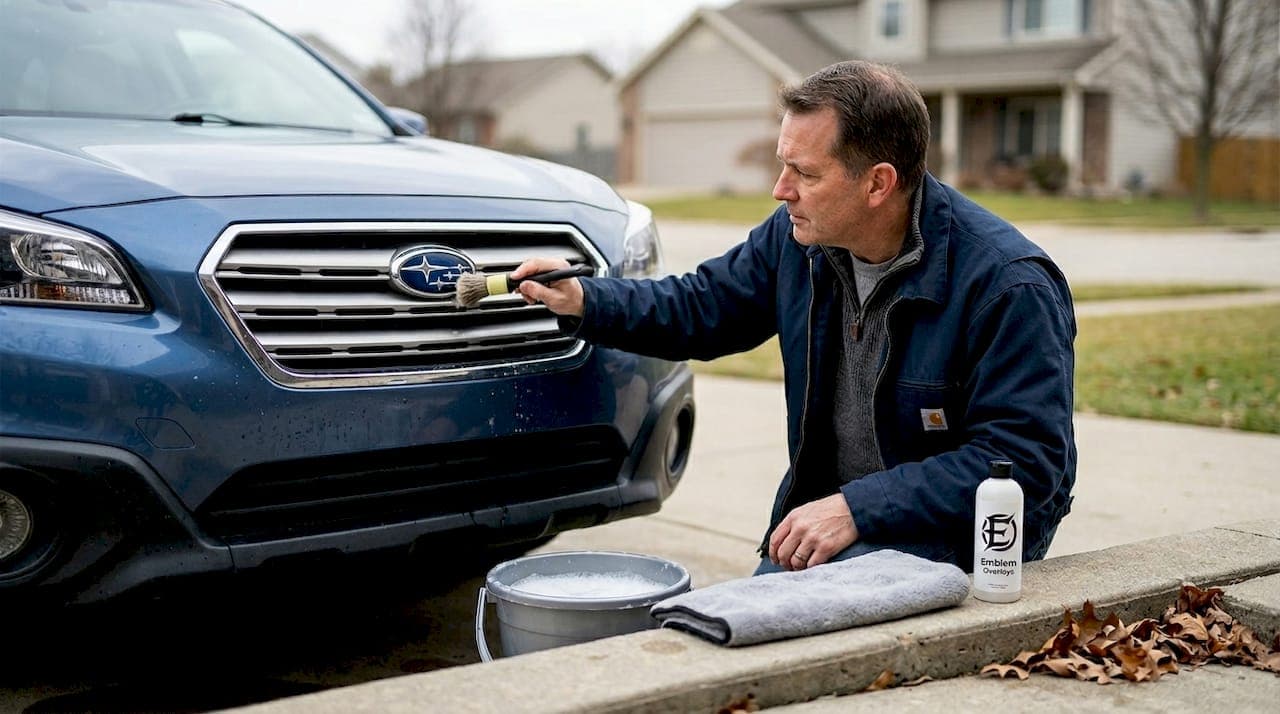
Your Subaru's star cluster or Ford's oval badge collects road grime, wax buildup, and brake dust faster than almost any other part of the car. That layer of crud does two things: it dulls the look of an otherwise clean vehicle, and it quietly sabotages any custom overlay you try to apply on top. Getting the emblem truly clean, not just wiped down, is the difference between an overlay that lasts two years and one that peels at the edges after two months. This guide walks you through every tool, every step, and every mistake to avoid so your emblems look factory fresh and your overlays stick the way they should.
Table of Contents
- What you need: Tools and materials for cleaning car emblems
- Step-by-step cleaning process for car emblems
- Troubleshooting and common mistakes to avoid
- Expected results: Clean emblems and perfect overlay readiness
- Our perspective: Why emblem cleaning is the underrated key to custom style
- Take your clean emblems to the next level
- Frequently asked questions
Key Takeaways
| Point | Details |
|---|---|
| Use gentle tools | Soft brushes and non-abrasive cleaners prevent scratches and ensure a pro level clean. |
| Spot test every product | Testing cleaners on a hidden area first protects against damage or unwanted reactions. |
| Removal boosts results | For deep cleans and overlays, carefully detaching the badge removes hidden grime and leftover adhesive. |
| Proper prep allows overlays to last | Well-cleaned, oil-free emblems help overlays stick better and look sharper, longer. |
What you need: Tools and materials for cleaning car emblems
Before you touch the emblem, gather everything first. Stopping mid-process to hunt for a brush or a clean towel is how accidents happen. You rush, you grab the wrong rag, and suddenly there's a scratch across the face of your Forester's badge.
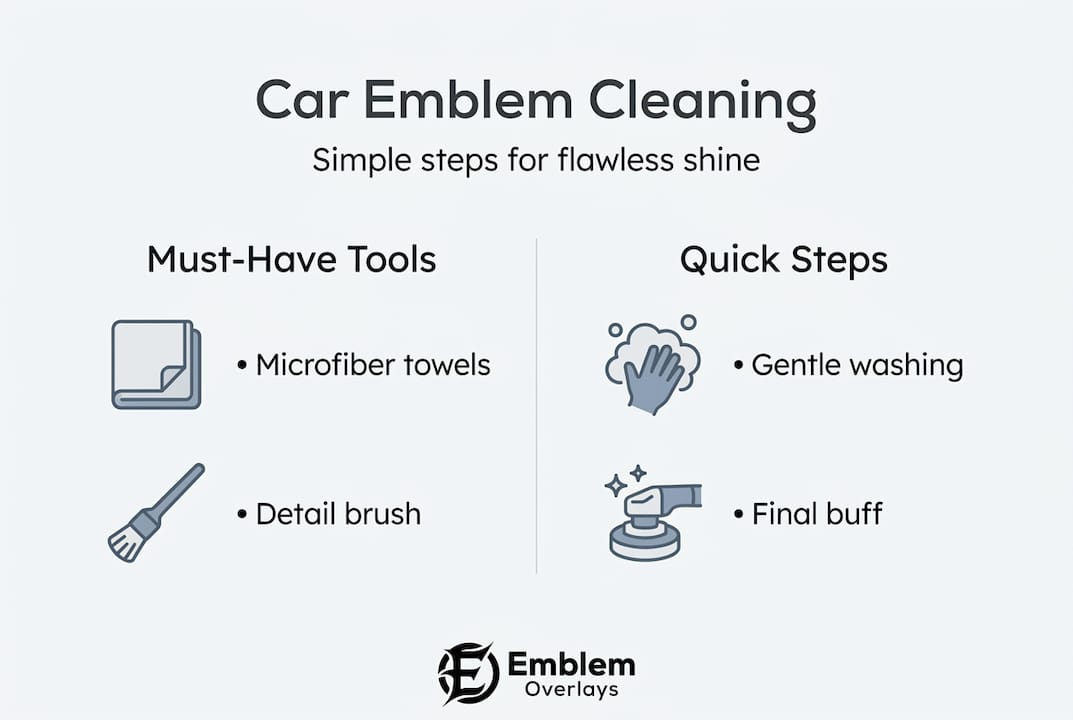
Here is a breakdown of what you need and why each item earns its place on the list:
| Item | Purpose | Subaru/Ford note |
|---|---|---|
| Microfiber towels (3 or more) | Lint-free wiping and final buffing | Use separate towels for cleaning and drying |
| Soft-bristled detailing brush | Cleaning inside logo cutouts and raised lettering | Essential for Subaru star cluster detail |
| Diluted car wash soap | Gentle surface cleaning without stripping clear coat | Safe on both plastic and chrome finishes |
| Quick detailer spray | Loosening light grime before scrubbing | Works well on Ford oval's glossy surface |
| Isopropyl alcohol (70% or 90%) | Final degreasing wipe before overlay application | Critical step for overlay adhesion |
| Plastic trim removal tool | Prying clips without scratching paint | Common for Ford grille badge removal |
| Fishing line or dental floss | Cutting through adhesive tape during removal | Standard method for Subaru adhesive badges |
| Hairdryer or heat gun | Softening adhesive before removal | Use at medium setting, never high |
| Adhesive remover (Goo Gone or similar) | Removing tape residue after badge removal | Test on hidden area first |
For getting into tight spots, cleaning before overlays requires a level of detail most people skip. According to detailing enthusiasts, a soft-bristled toothbrush or dedicated detailing brush used with quick detailer or diluted car soap is the right tool for cleaning inside logo cutouts without scratching the finish.
Key supplies to keep on hand:
- At least three clean microfiber towels, one for washing, one for rinsing, one for drying
- A dedicated detailing brush with natural or synthetic soft bristles
- Isopropyl alcohol in a small spray bottle for easy application
- Plastic trim tools if you plan to remove the badge entirely
Pro Tip: Always do a spot test with any new cleaner on a hidden area of the emblem or surrounding trim. Some adhesive removers can cloud plastic finishes or lift nearby decals if left on too long.
Step-by-step cleaning process for car emblems
With your gear ready, here's exactly how to get every corner of your emblem sparkling. Work through these steps in order and don't skip ahead, especially if you plan to apply an overlay at the end.
-
Rinse the emblem area. Use a garden hose or a spray bottle of water to rinse loose dirt and grit off the badge and the surrounding paint. This prevents dragging abrasive particles across the surface in the next step.
-
Apply diluted soap and scrub gently. Mix a few drops of car wash soap in a small bucket of water. Dip your detailing brush and work it across the face of the emblem, then push the bristles into the recessed areas around lettering or logo cutouts. The soft-bristled brush technique is the most effective way to pull grime out of tight spaces without scratching.
-
Rinse thoroughly. Flush the soap out of every crevice. Soap residue left in the grooves of a Subaru star cluster or Ford oval will prevent overlays from sitting flat.
-
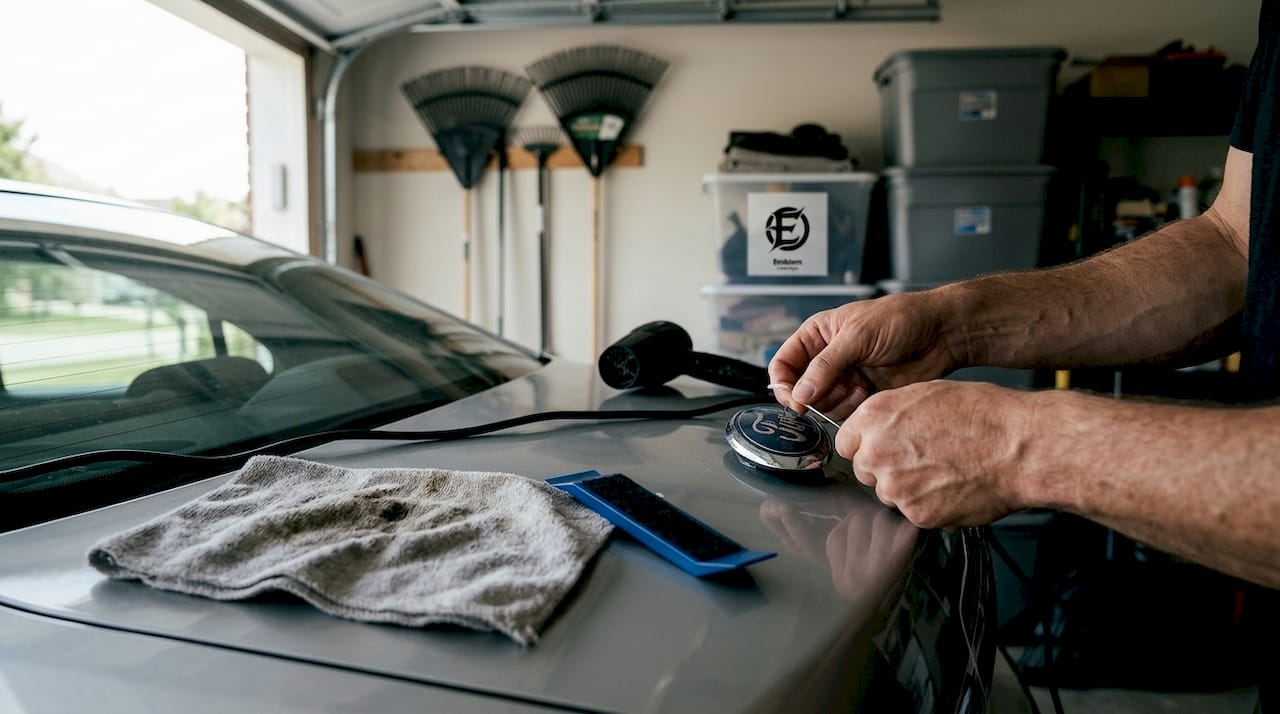
Inspect and decide: clean in place or remove? Check whether the emblem is clean enough or if grime has built up behind the badge. Use the table below to decide.
-
If removing: apply heat and use floss. A hairdryer at medium distance for no more than 30 seconds softens the adhesive tape. Then run dental floss or fishing line behind the badge in a sawing motion to cut through the tape. Subaru badges typically use adhesive mounting, while Ford badges on the grille often use clips or nuts, so check your specific model before pulling.
-
Remove adhesive residue. Apply adhesive remover to a microfiber cloth and wipe the area where the badge sat. Let it dwell for 30 seconds, then wipe clean. Follow with a soap wash to neutralize any chemical residue.
-
Dry completely. Use a clean, dry microfiber towel to blot and buff the emblem and surrounding area. Any moisture trapped under an overlay will cause lifting within days.
-
Final wipe with isopropyl alcohol. This is the step most people skip, and it's the most important one before overlay application. Alcohol removes the invisible film of oils, wax, and cleaner residue that soap alone cannot eliminate.
Warning: Never use metal tools to pry or scrape emblems. Never hold a heat gun closer than six inches from the paint surface. Harsh chemicals like acetone can cloud or melt plastic emblems permanently. These mistakes are not recoverable without replacement parts.
Cleaning in place vs. full removal: a quick comparison
| Factor | Cleaning in place | Full removal |
|---|---|---|
| Time required | 10 to 20 minutes | 30 to 60 minutes |
| Risk to paint | Very low | Low to moderate |
| Cleaning depth | Surface and grooves only | Full badge and mounting area |
| Best for | Routine maintenance | Overlay prep or heavy buildup |
| Subaru consideration | Works for most routine cleaning | Necessary for behind-badge grime |
| Ford consideration | Works for adhesive-mounted badges | Grille badges may need clip tools |
Pro Tip: When using a hairdryer to soften adhesive, count to 30 seconds at medium power and medium distance, then test the badge. If it doesn't move easily, apply heat again for another 15 seconds rather than forcing it. Patience here saves paint.
Once you've gone through this process, you'll be ready to personalize your Subaru or Ford emblem with confidence, knowing the surface underneath is truly prepared.
Troubleshooting and common mistakes to avoid
Even with clear steps, some mistakes are easy to make. Here's how to sidestep the issues that most people encounter the first time they detail an emblem.
Mistake 1: Using metal tools Metal scrapers and flathead screwdrivers are the number one cause of paint scratches and chipped plastic during badge removal. Always use plastic trim removal tools. If you don't have one, a wrapped credit card works in a pinch.
Mistake 2: Overusing heat Holding a heat gun too close or too long can bubble paint, warp plastic emblems, and melt the adhesive into the paint rather than softening it for clean removal. Stick to 30 seconds at medium distance and never exceed that on the first pass. Ford grille emblems mounted with clips require little to no heat since you're releasing a mechanical fastener, not softening tape.
Mistake 3: Using harsh chemicals on plastic emblems Products containing acetone, bleach, or strong degreasers can permanently cloud or discolor plastic badge surfaces. Stick to diluted car soap, quick detailer, and isopropyl alcohol. If you use an adhesive remover, choose one labeled safe for automotive plastics.
Mistake 4: Skipping adhesive residue removal This is the most common reason overlays fail early. If old tape residue is left on the emblem surface, the overlay sits on a bumpy, contaminated layer. It looks fine at first but starts lifting at the edges within weeks. Remove every bit of residue before moving on.
Mistake 5: Not drying completely before overlay application Water and isopropyl alcohol both need time to fully evaporate. Apply the overlay within 5 to 10 minutes of the alcohol wipe so the surface is clean but fully dry. Waiting longer than 20 minutes in a dusty environment means you may need to wipe again.
Test before you commit: Any new cleaning product, adhesive remover, or detailing spray should be tested on a small, hidden area of the emblem or surrounding trim before full application. This takes 60 seconds and can save you from an irreversible finish problem.
For ongoing care after your overlay is applied, overlay maintenance tips will help you keep both the emblem and the overlay looking sharp through seasons of driving.
Expected results: Clean emblems and perfect overlay readiness
Once cleaned and checked, here's what you can expect and how to keep the results lasting.
A properly cleaned emblem delivers more than just good looks. Here's what changes after a thorough cleaning:
- Restored visual clarity. Grime, wax haze, and oxidation buildup make emblems look dull and faded. After cleaning, the original color, gloss, and detail of the badge come back sharply.
- Better overlay adhesion. Vinyl overlays bond to clean, dry, alcohol-wiped surfaces far more reliably than to contaminated ones. Subaru owners who apply overlays to alcohol-cleaned emblems consistently report longer adhesion life and cleaner edge lines.
- Protection from corrosion. Dirt and moisture trapped around badge edges can cause rust on metal mounting hardware and staining on surrounding paint. Regular cleaning removes those materials before they cause damage.
- A surface that holds up through weather. A clean, well-prepped emblem with a quality overlay resists UV fading, road salt, and car wash brushes better than a bare, dirty badge.
Subaru badges are typically mounted with adhesive tape, which means the heat-and-floss removal method works consistently across most models. Ford badge mounting varies more widely: grille badges on trucks and SUVs often use clips or nuts, while tailgate badges tend to use adhesive. Knowing which system your vehicle uses before you start prevents broken clips and unnecessary frustration.
Repeat this full cleaning process every three to six months for maintenance, or any time you notice the emblem looking dull or the overlay edges starting to lift. A quick 15-minute refresh keeps everything looking intentional and sharp.
For inspiration on what to do with a freshly prepped surface, browse custom overlays for a new look to see how other Subaru and Ford owners have used overlays to make their badges stand out.
Our perspective: Why emblem cleaning is the underrated key to custom style
You've seen the steps. In practice, here's why this process matters more than most overlay guides will tell you.
Most enthusiasts spend real money on overlays, wraps, and accessories, then apply them over emblems that haven't been properly cleaned since the car rolled off the lot. The result is an overlay that looks great for a few weeks and then starts lifting at one corner, collecting dust underneath, and eventually peeling in a way that looks worse than the original badge. The mod gets blamed. The product gets blamed. But the surface was the problem all along.
We've seen this pattern repeatedly. The cleaning step gets treated as a formality, something you do quickly before the "real" work of applying the overlay. But the cleaning is the real work. Everything else is just decoration placed on top of the foundation you built.
There's also a deeper point here about what customization actually means. Putting a state flag overlay on your Subaru Outback or a custom design on your Ford F-150 badge is a statement about who you are and what you care about. That statement lands differently when the emblem underneath is pristine versus when it's sitting on a haze of old wax and road grime. The details communicate care, and care is what separates a vehicle that turns heads from one that just has stickers on it.
The time you invest in proper cleaning, maybe 30 to 45 minutes done right, pays back every single time you walk up to your vehicle. The overlay sits perfectly flat. The edges are invisible. The design pops the way it was meant to. That's the outcome worth working toward.
If you've been thinking about changing up your badge game, personalize and protect your ride with a foundation that actually supports the look you're going for.
Take your clean emblems to the next level
You've put in the work to get your emblems spotless and properly prepped. Now is the perfect moment to make them truly yours.
At Emblem Inlays, we make precision-cut vinyl emblem overlays designed to fit directly over the factory badges on Subaru and Ford vehicles. With hundreds of designs available, including every state flag, you can match your home state, your favorite team's colors, or a design that fits your personality. Our overlays are made to sit flush on a clean, alcohol-wiped surface exactly the kind of surface you just created. Browse the full collection at Emblem Inlays and find the design that finishes your build. For a closer look at what makes handmade overlays worth it, see how we approach enhancing vehicle aesthetics with quality materials and precise fitment.
Frequently asked questions
Can I clean car emblems without removing them from my Subaru or Ford?
Yes, gentle cleaning with a soft detailing brush and diluted car soap handles most surface dirt and grime effectively without removal. Removal is only necessary when grime has built up behind the badge or when you need a perfectly clean surface for overlay application.
What's the safest way to remove a car emblem for deep cleaning?
Apply medium heat for no more than 30 seconds with a hairdryer, then work dental floss or fishing line behind the badge to cut through the adhesive. Always use plastic trim tools, never metal, to avoid scratching the paint.
Should I use rubbing alcohol after cleaning car emblems?
Yes, a final wipe with isopropyl alcohol removes the invisible residue of oils, wax, and cleaning products that soap leaves behind. This step is essential if you plan to apply an overlay since it creates the clean, dry surface that vinyl adhesive bonds to best.
Are there differences between Subaru and Ford emblem cleaning?
The cleaning process itself is the same for both brands, but badge mounting varies significantly. Subaru badges typically use adhesive tape, while Ford badges may use clips, nuts, or adhesive depending on the location and model, so check your specific vehicle before attempting removal.