TL;DR:
- Skipping the color-matching process often results in visible mismatches due to finish differences and lighting conditions, not just color.
- To achieve a seamless look, always identify your vehicle’s exact factory paint code and match overlay finish (gloss or matte) under natural daylight before installation.
You spent good money on a set of emblem overlays, stuck them on your Subaru or Ford, stepped back to admire the result, and felt that sinking disappointment. The color is slightly off. Under the afternoon sun, the overlay looks almost right. In the garage, it looks like a completely different shade. That frustrating outcome is more common than most car owners realize, and it almost always comes down to one thing: skipping the color-matching process and hoping for the best. This guide walks you through a proven, step-by-step workflow so your next overlay install looks intentional, polished, and genuinely seamless.
Table of Contents
- What you need before matching overlays
- Step-by-step: How to match overlay to car color
- Common pitfalls and how to avoid a mismatch
- When to go custom and what to expect with universal overlays
- What most people miss about color-matching overlays
- Where to find high-quality overlays and custom options
- Frequently asked questions
Key Takeaways
| Point | Details |
|---|---|
| Paint code is essential | Always start with your vehicle's exact paint code, not just your eye, to match an overlay. |
| Lighting changes perception | Test overlay color in daylight, shade, and artificial light before final placement. |
| Finish matters | Gloss or matte overlays can look different, even if the color is close to OEM. |
| Custom options exist | If OEM match isn't available, custom overlays or thematic finishes provide style alternatives. |
| Preparation prevents mistakes | Proper cleaning, careful alignment, and genuine color validation save you from common overlay blunders. |
What you need before matching overlays
Before you dive into matching, make sure you have everything ready for a flawless result. Preparation is where most people either win or lose this project before they even open the overlay package.
The single most important piece of information you need is your vehicle's exact factory paint code. Do not rely on visual comparison alone. A color that looks "close enough" on a website thumbnail can look noticeably different once it's on your car. As a critical first step, identify your factory paint code rather than matching by eye.
Where to find your paint code:
| Vehicle | Common label locations |
|---|---|
| Subaru | Driver-side door jamb, B-pillar sticker, firewall |
| Ford | Driver-side door jamb, radiator support, glove box |
If the label is faded, missing, or unreadable, you have two reliable backup options. First, call your dealership and give them your VIN (Vehicle Identification Number). They can pull the exact paint code from factory records in minutes. Second, check an online VIN decoder that specifies paint codes for your make and model year.
Beyond the paint code, gather these materials before you start:
- A high-quality adhesive vinyl overlay (sized for your specific emblem)
- Isopropyl alcohol or a dedicated automotive degreaser
- Two or three clean microfiber cloths
- A plastic squeegee or credit card wrapped in a soft cloth
- Bright, natural lighting or a portable work light
Overlay material matters more than most people expect. Vinyl overlays come in two primary finish categories: gloss and matte. A gloss finish reflects light the same way standard clear-coated paint does. A matte finish absorbs light similarly to satin or flat paint. Choosing the wrong finish, even with the correct color, will produce a visible mismatch because the two surfaces react differently to light at different angles. Check your car's finish first, then match the overlay finish accordingly.
Pro Tip: Before ordering, look at your car's paint under both direct sunlight and shade. If it has a mirror-like shine, you want a gloss overlay. If it has a softer, non-reflective look, choose matte. This simple observation prevents the most common finish-mismatch mistake.
If you want to explore the full range of what overlays can do for your vehicle, this Subaru and Ford emblem overlay guide covers practical considerations from material selection to final install. You can also browse custom Subaru and Ford overlays for inspiration before settling on a color and style direction.
Step-by-step: How to match overlay to car color
Now that you're equipped with the right materials and information, let's walk through the actual process, step by step. Rushing any of these stages is the most reliable way to end up with a result you'll want to peel off by the weekend.
Step 1: Confirm your paint code Look up your confirmed paint code on the overlay supplier's color chart or reference guide. If you can't find an exact match, note the closest options and order samples if the supplier offers them. Never assume two color names that sound similar are actually the same formula.
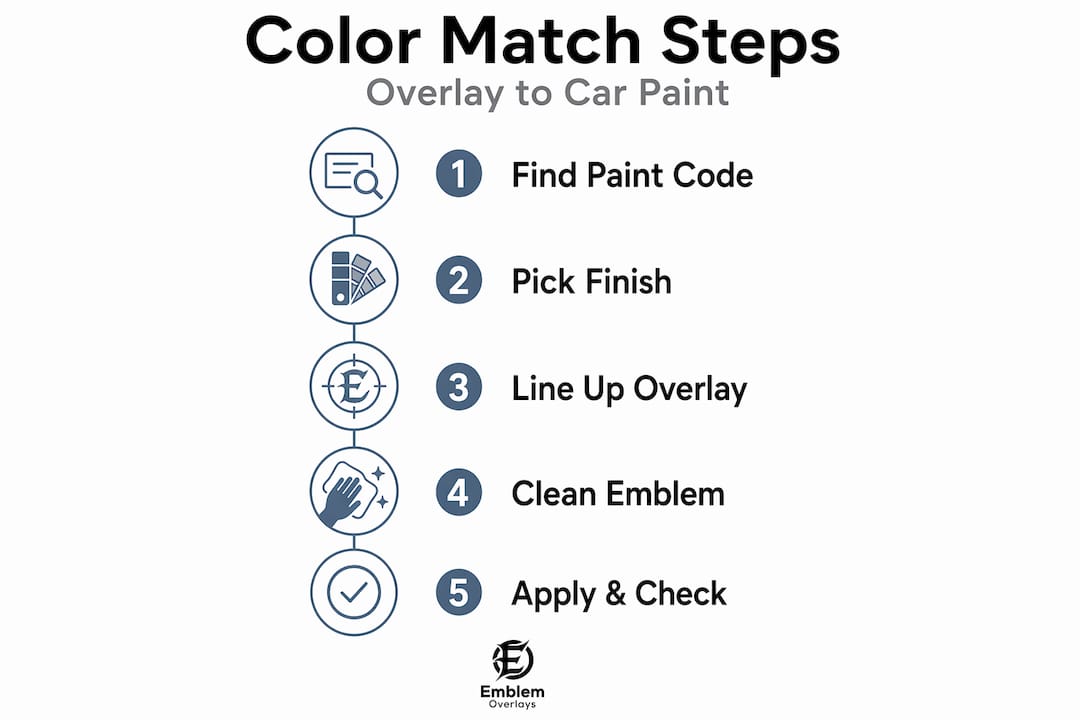
Step 2: Choose the right color and finish Cross-reference your paint code with the overlay color options. A practical color-matching workflow used by experienced installers is: confirm the paint code, pick an overlay that corresponds to that code in both color and finish (gloss vs. matte), then clean and degrease the emblem before applying, and finally run a visual check under multiple lighting conditions.
Step 3: Do a dry comparison in daylight Hold your overlay sample or new overlay next to the actual emblem area on your car. Do this outside in natural daylight, ideally between 10 a.m. and 2 p.m. when sunlight is most neutral. Avoid fluorescent garage lighting for this step. Daylight reveals the truest color relationship between your paint and the overlay material.
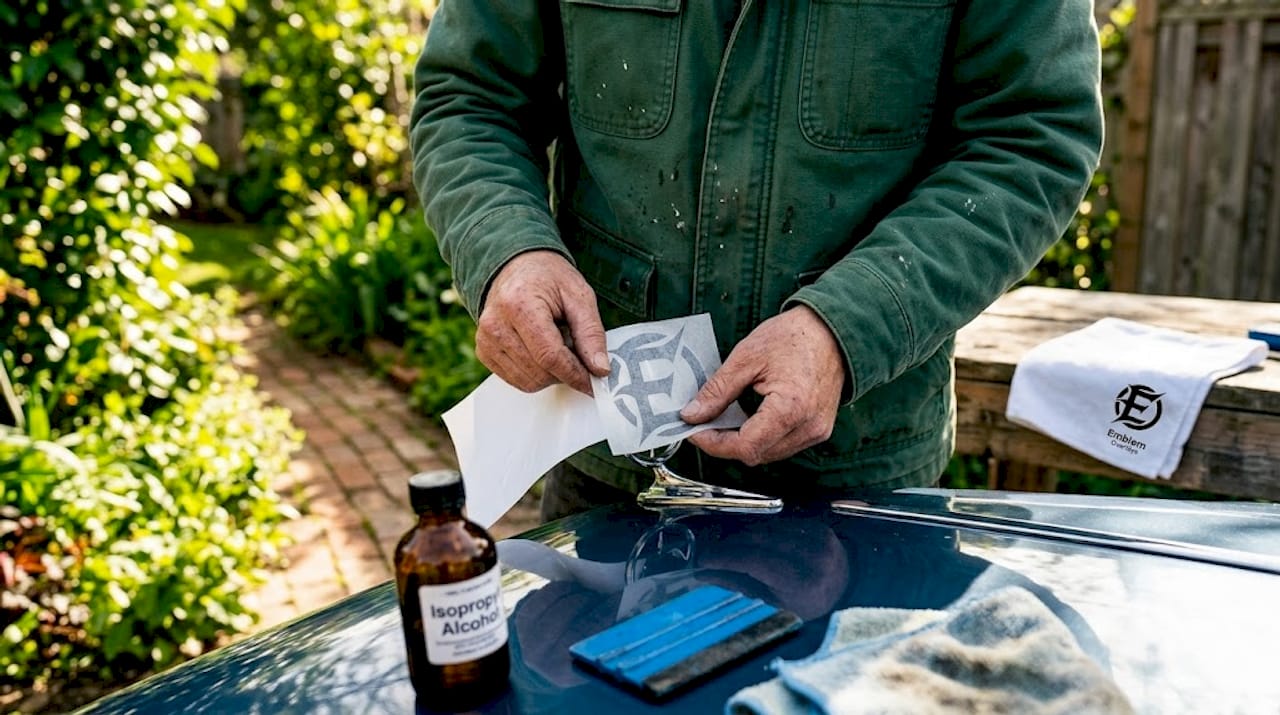
Step 4: Clean and degrease the emblem surface Wipe the emblem thoroughly with isopropyl alcohol or automotive degreaser. Let it dry completely. Oils from handling, road grime, and wax residue will all prevent proper adhesion and can create bubbles under the overlay that distort color perception at the edges.
Step 5: Apply the overlay carefully Peel the backing from the overlay slowly. Position it over the emblem, starting from one edge. Use your squeegee to press outward from center to edges, eliminating air pockets as you go. Work slowly. Once the adhesive contacts the surface, repositioning is difficult without risking damage to the overlay.
Step 6: Final visual check under varied lighting After application, view your work in at least three different lighting conditions: direct sunlight, open shade, and indoor artificial light. Professional refinish color matching follows this same verification approach, using formula selection followed by visual checks under varied lighting to catch any corrections needed.
| Lighting condition | What it reveals |
|---|---|
| Direct sunlight | True color saturation and gloss level |
| Open shade | Mid-range tones and subtle color shifts |
| Indoor fluorescent | How the overlay looks in parking garages |
| Incandescent/warm indoor | Evening or showroom viewing angle |
Pro Tip: Take a photo of the emblem area with your phone camera (no flash) in each lighting condition. Your eye adapts to color shifts automatically, but photos capture the difference objectively. If the photos show a clean match in most conditions, you're in great shape.
For a more detailed walk-through of the entire installation, the stepwise overlay process covers each stage with additional tips for first-time installers.
Common pitfalls and how to avoid a mismatch
With the basic steps in mind, it's just as important to understand and avoid the most common mistakes. Knowing what goes wrong in advance saves you from having to pull off a freshly applied overlay and start over.
The most frequent mistakes include:
- Ordering by color name rather than paint code
- Ignoring finish differences (gloss vs. matte) when selecting overlays
- Applying overlays to uncleaned or waxed surfaces
- Checking the color match only under indoor lighting
- Not confirming emblem size before ordering
"Even if the color code is correct, small surface and lighting differences can cause a visible mismatch. Verifying your chosen overlay color under real-world lighting after placement is essential." — Subaru Forester owner forum
This is a point that catches a surprising number of experienced DIYers off guard. The paint code guarantees the correct color formula, but it doesn't account for how that color interacts with your car's specific clear coat thickness, the age of the paint, or any previous detailing treatments. An older car with oxidized paint will reflect light differently than a brand-new vehicle with factory-fresh clear coat, even when both technically share the same paint code.
Emblem size and fitment play a bigger role in perceived color match than most people realize. If an overlay doesn't sit flush to the emblem edges, those exposed gaps create strong contrast lines that make the color appear more mismatched than it actually is. Reputable Ford overlay fitment tips consistently emphasize confirming exact emblem dimensions before ordering. A poor edge fit amplifies every minor color discrepancy.
Statistic to consider: Studies in automotive refinishing show that human eyes can detect color differences as small as one Delta E unit under controlled lighting, but that sensitivity doubles in mixed or shifting light conditions. Practically, this means an overlay that looks perfect in your driveway at noon might look noticeably off under a parking garage's fluorescent lights.
Finally, misaligned overlays are a compounding problem. An overlay that sits two millimeters off-center doesn't just look crooked. It creates an uneven edge shadow that the brain reads as a color inconsistency even when none exists. Take your time during application. Patient alignment prevents problems that have nothing to do with color but everything to do with appearance.
When to go custom and what to expect with universal overlays
Sometimes, matching exactly isn't feasible, so here's what to do if your color isn't in stock or you want a different look entirely.
Universal overlays are pre-produced in a set range of popular colors and finishes. They work well for common color themes like blackout, chrome, and smoked finishes. However, it's worth knowing upfront that many overlays are designed for styling themes rather than exact OEM paint-code color matching. If you drive a Subaru in Plasma Yellow Pearl or a Ford in Antimatter Blue, an exact pre-made match may not exist.
Universal overlays vs. custom overlays at a glance:
| Feature | Universal overlays | Custom overlays |
|---|---|---|
| Color options | Limited preset range | Based on your paint code |
| Cost | Lower | Higher |
| Availability | Immediate | Lead time required |
| OEM color match | Unlikely for rare colors | Much closer for common codes |
| Best for | Stylistic themes | Near-exact paint matching |
When an exact match isn't possible, consider committing to a deliberate style theme instead. This approach sidesteps the mismatch problem entirely by making a clear design statement. Popular alternatives include:
- Blackout overlays: Replace chrome or colored emblems with flat or gloss black for an aggressive, modern look
- Color accent overlays: Choose a contrasting color that complements your car's paint rather than matching it
- Smoked overlays: A translucent dark film that mutes the emblem subtly
- State flag overlays: A bold personalization choice that makes no pretense about matching paint
If you want to understand the full spectrum of what's available before making a decision, reviewing Ford overlay types and browsing custom Ford overlay examples will show you how other owners have handled both matching and contrasting approaches effectively.
What most people miss about color-matching overlays
Let's step back and look at what separates a truly sharp-looking overlay install from a disappointing one. The honest answer isn't about finding the perfect paint code or buying the most expensive overlay. It's about understanding that color is not a fixed property.
Color changes. It shifts based on the angle of the light source, the time of day, the finish of the surface, and even what colors surround it. This phenomenon, called metamerism (where two colors that match under one light source look different under another), affects every painted and coated surface. Professional refinishers know this, which is why expert refinish color matching always involves visual validation under real-world lighting, not just a formula verification in a controlled environment.
Most DIY overlay enthusiasts check the color once, in one light, and call it done. That's the gap. The paint code gives you the right starting point, but it doesn't guarantee the result. Two cars with the same code can look slightly different because one has a thicker factory clear coat, or because the paint has aged differently. An overlay applied over the factory emblem sits on a slightly different surface plane than the painted body panels, which changes how light hits it.
The practical wisdom here is to approach your Ford badge overlay installation the way a body shop approaches a panel repaint. Start with the code, validate visually, and be honest with yourself about what "close enough" means for your situation. A deliberate design choice, like a contrasting accent color or a bold state flag design, will always look more intentional than a near-match that reads as a mistake under certain lighting.
Managing expectations isn't settling. It's how experienced modders get results they're proud of.
Where to find high-quality overlays and custom options
Ready to put your new knowledge into action? Here's where you can find overlays tailored to your style.
At Emblem Inlays, we specialize in handmade vinyl emblem overlays built specifically for Subaru and Ford vehicles. Every overlay is precision-cut to fit your factory emblem, which means clean edges and no awkward gaps that expose a color mismatch. We offer hundreds of designs, including all 50 state flags, blackout finishes, color accents, and custom options for owners who want something that genuinely reflects their personality. Our overlays are made to order, which means you're not getting a generic universal piece pulled off a shelf. Whether you're chasing a near-exact paint match or going bold with a contrasting design, our catalog gives you options that are built for fit, finish, and long-term durability. Browse our full selection at embleminlays.com and find the overlay that makes your Subaru or Ford look exactly the way you want it.
Frequently asked questions
Where do I find my Subaru or Ford's paint code?
Look for the paint-code label in the driver-side door jamb, B-pillar, or trunk lid area. If it's missing, your dealer can locate the paint code by running your VIN through factory records.
Can I get an emblem overlay that exactly matches my car's paint?
Some custom overlay suppliers use paint codes to get very close, but a truly perfect match is difficult because many overlays are designed around styling themes rather than OEM-exact color formulas, and finish differences can affect the result.
Does lighting affect how closely the overlay matches my car color?
Yes, and significantly. Sunlight, open shade, and artificial lighting can all shift how the overlay color reads against your car's paint, which is why lighting-related mismatches appear even when the paint code is correct.
Are there overlays for non-standard colors or just basics like black and chrome?
Universal overlays typically cover standard finishes, but some suppliers offer custom colors using your paint code. That said, many overlay products are primarily built around popular styling themes, so rare OEM colors may require a custom order or a creative alternative approach.