You want your Ford to stand out, but replacing emblems costs hundreds of dollars and voids warranties. Painting or applying vinyl overlays lets you personalize your vehicle affordably while protecting the original emblem underneath. This tutorial walks you through accessible DIY methods, from surface prep to final sealing, so you can achieve professional results at home. Whether you choose permanent paint or reversible vinyl, you'll learn exactly what tools to gather, how to avoid common mistakes, and how to maintain your custom look for years.
Table of Contents
- Key takeaways
- What you need: tools, materials, and preparing your Ford emblem
- Step-by-step process: painting and vinyl overlays for customization
- Avoiding common mistakes and troubleshooting customization issues
- Expected results and maintaining your customized emblem
- Explore professional Ford emblem overlays for quick customization
- FAQ
Key Takeaways
| Point | Details |
|---|---|
| Painting and vinyl overlays | The article presents painting and vinyl overlays as the main affordable customization options for emblems. |
| Surface prep and masking | Proper cleaning, masking, and protective steps prevent damage and ensure adhesion during application. |
| Sensor aware emblems | Newer Ford models may have radar or camera sensors behind emblems, so verify clearance before removal to avoid issues. |
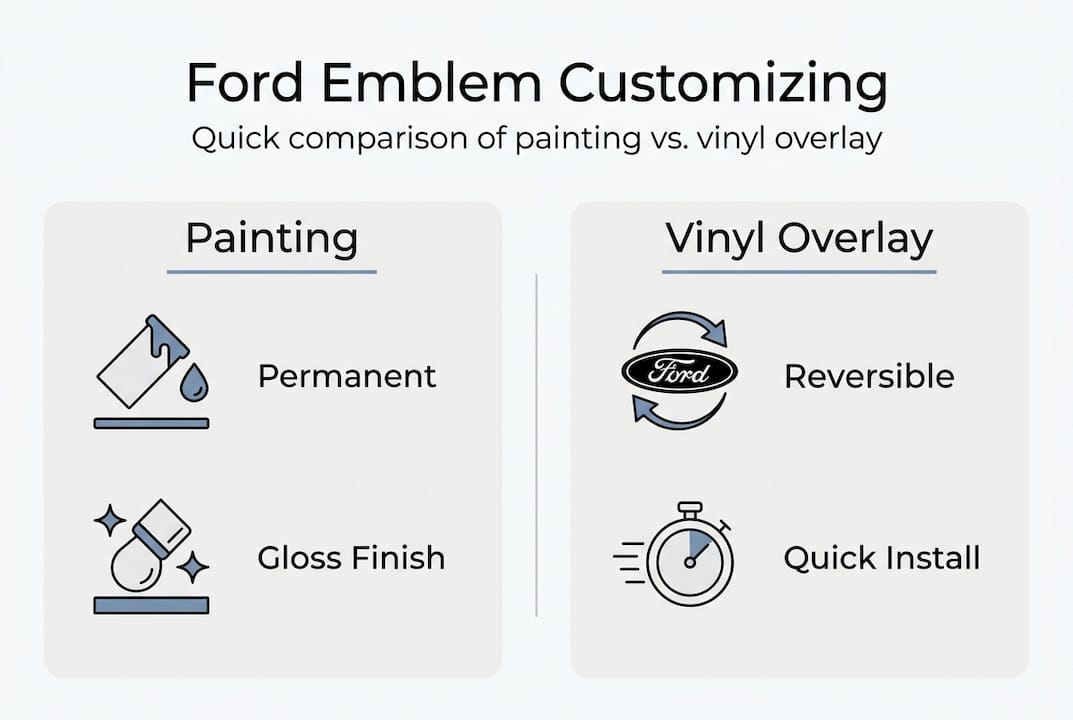
| Permanent paint vs reversible vinyl | Paint creates a permanent color change while vinyl offers a reversible option with easier removal. |
What you need: tools, materials, and preparing your Ford emblem
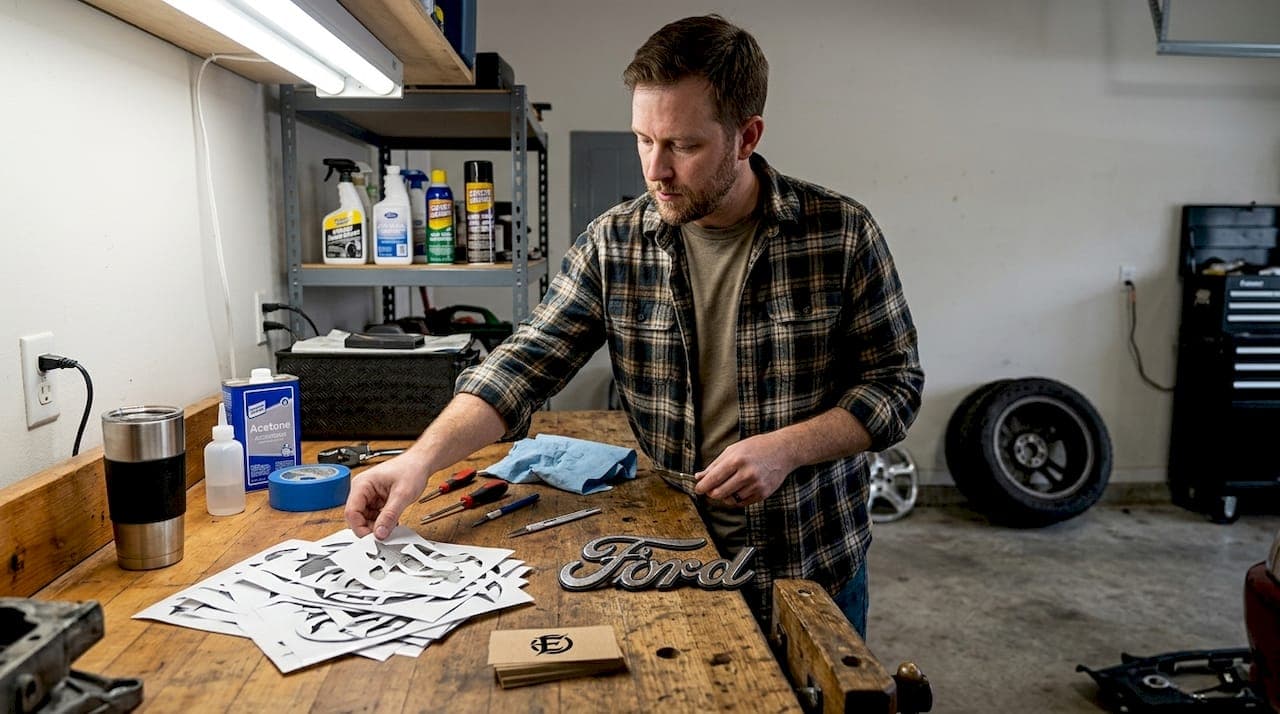
Gathering the right supplies ensures smooth application and lasting results. For painting, you'll need acetone, automotive spray paint in your chosen color, masking tape, clear coat, and Envirotex resin for sealing. For vinyl overlays, collect rubbing alcohol, vinyl sheets cut to your emblem size, a plastic squeegee, and a heat gun or hairdryer. Both methods require fishing line or dental floss if you plan to remove the emblem from the vehicle.
Removing the emblem depends on your Ford model. Most emblems attach with adhesive backing, so slide fishing line behind the badge and work it back and forth to cut through the adhesive. Grille emblems often use plastic clips or bolts accessible from behind the grille. Check your owner's manual or online forums for model-specific removal steps. Newer models, especially 2021+ F150 trucks, may have radar or camera sensors behind emblems, so verify your setup before attempting removal.
For painting, mask chrome areas with chapstick or crayon before applying acetone. This protects the chrome finish while you strip the factory paint. Apply acetone with a cotton swab or small brush, working in a ventilated area. The factory paint will bubble and lift within seconds. Wipe away the residue, then rinse and dry the emblem completely before painting.
For vinyl overlays, skip the acetone and focus on surface cleaning. Use rubbing alcohol on a lint-free cloth to remove oils, wax, and dirt. Never use soap or water, as residue interferes with adhesive bonding. Clean emblems before overlays to ensure the vinyl sticks flat without bubbles or edge lift. Let the alcohol evaporate completely before applying vinyl.
Pro Tip: Measure your emblem dimensions before ordering vinyl or choosing paint. Ford uses different emblem sizes across models and years, and a mismatch wastes time and materials.
| Tool/Material | Painting | Vinyl Overlay |
|---|---|---|
| Acetone | Required | Not needed |
| Spray paint | Required | Not needed |
| Rubbing alcohol | Optional | Required |
| Vinyl sheet | Not needed | Required |
| Squeegee | Not needed | Required |
| Heat source | Not needed | Required |
| Masking tape | Required | Optional |
| Envirotex resin | Required | Not needed |
Step-by-step process: painting and vinyl overlays for customization
Painting delivers a permanent color change with a factory-style finish. Start by removing the emblem and stripping factory paint with acetone. Once the surface is bare metal or plastic, apply masking tape around chrome edges to protect them. Spray thin, even coats of automotive paint, holding the can 8-10 inches away. Allow each coat to dry 10 minutes before applying the next. Three to four coats provide full coverage without drips.
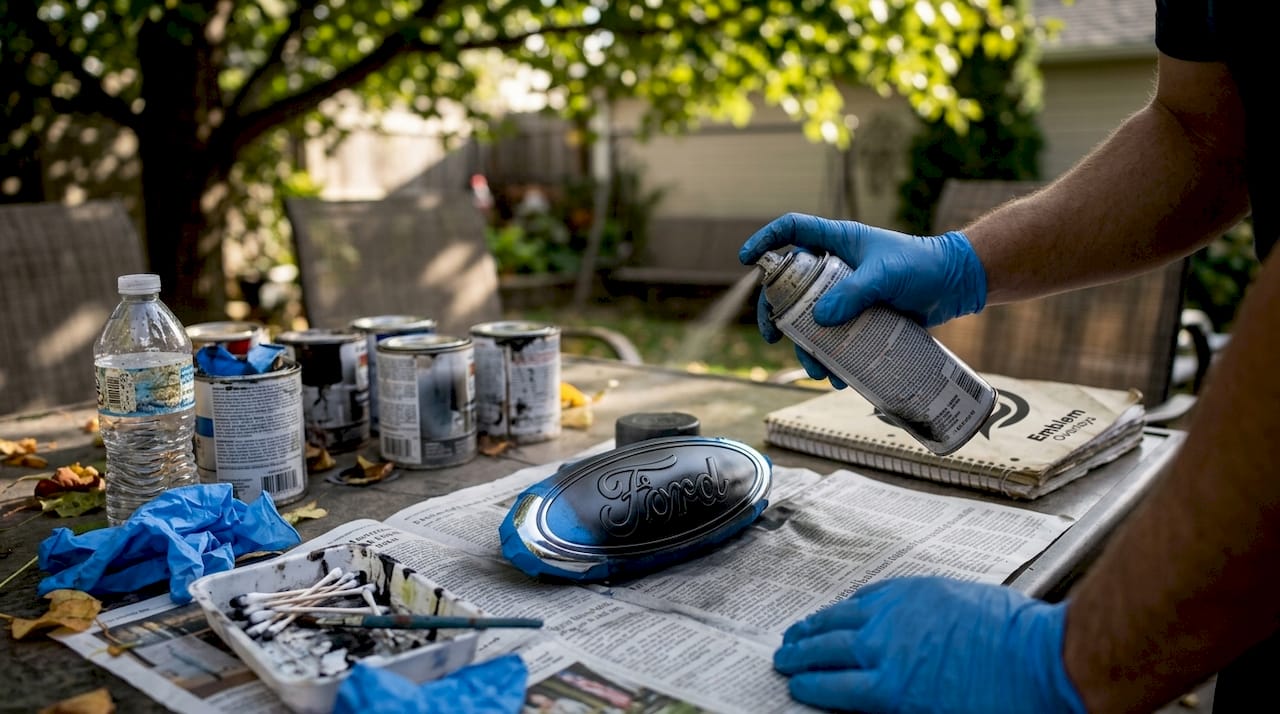
After the final paint coat dries for 24 hours, apply a clear coat for UV protection. Let the clear coat cure for another 24 hours, then seal the emblem with Envirotex resin. Mix the two-part resin according to package directions, pour it over the emblem surface, and let it self-level. The resin creates a glossy, durable finish that resists chips and fading. Cure time is 72 hours before reinstalling the emblem.
Vinyl overlays offer a faster, reversible option. Clean the emblem with rubbing alcohol and let it dry completely. Peel the backing from the vinyl overlay, align it carefully over the emblem, and press the center down first. Use a plastic squeegee to smooth the vinyl outward from the center, pushing out air bubbles as you go. Work slowly to avoid trapping air or creating wrinkles.
Once the vinyl is fully applied, use a heat gun on low setting or a hairdryer to warm the vinyl. This activates the adhesive and allows the vinyl to conform to emblem curves. Apply heat evenly, moving the heat source constantly to avoid melting the vinyl. Press the edges firmly as you heat them to ensure a strong bond. The entire process takes 15-20 minutes per emblem.
Pro Tip: Install vinyl overlays at 65-75°F in the shade for best adhesion. Cold temperatures make vinyl stiff and prone to cracking, while heat causes premature adhesive activation.
- Remove the emblem using fishing line or by unbolting from behind the grille
- Clean the surface with rubbing alcohol and let dry completely
- For painting: apply acetone to strip factory paint, then mask chrome areas
- For painting: spray 3-4 thin coats of automotive paint, drying 10 minutes between coats
- For painting: apply clear coat, cure 24 hours, then seal with Envirotex resin
- For vinyl: peel backing, align overlay, and squeegee from center outward
- For vinyl: heat with heat gun or hairdryer while pressing edges firmly
- Reinstall the emblem after full cure time (72 hours for paint, immediate for vinyl)
| Factor | Painting | Vinyl Overlay |
|---|---|---|
| Cost | $30-50 for supplies | $15-30 per overlay |
| Permanence | Permanent, difficult to reverse | Fully reversible |
| Skill level | Intermediate to advanced | Beginner friendly |
| Tools needed | Acetone, paint, resin, masking supplies | Alcohol, squeegee, heat source |
| Cure time | 72 hours | Immediate |
| Durability | Permanent with proper sealing | 5-7 years outdoors |
Measure these dimensions before starting:
- Emblem width at widest point
- Emblem height at tallest point
- Emblem depth or curve profile
- Mounting hole locations if reinstalling with clips
Avoiding common mistakes and troubleshooting customization issues
Acetone damages surrounding paint if you don't mask properly. Acetone and paint damage truck paint when applied beyond the emblem area, so use masking tape and chapstick to create a protective barrier. Work on a removed emblem whenever possible to eliminate this risk entirely. If you must work with the emblem installed, apply acetone with a cotton swab rather than pouring or spraying it.
Installing vinyl overlays on wet or dirty surfaces causes peeling and edge lift. Even a thin layer of wax or soap residue prevents proper adhesion. Always clean with rubbing alcohol, never water, and let the surface dry completely before applying vinyl. If you notice bubbles after installation, lift the vinyl gently, reapply alcohol to that section, and squeegee again with heat.
Boiling water removal methods sound convenient but often warp plastic emblems or damage the adhesive on newer models. Use fishing line and patience instead. For stubborn adhesive, apply a small amount of Goo Gone or adhesive remover to a cloth and rub gently. Avoid letting solvents contact painted surfaces.
When customizing emblems on vehicles with active safety systems, verify sensor locations before removal. Blocking or damaging radar sensors affects cruise control, collision warning, and automated braking features. Consult your owner's manual or dealership service department to identify sensor-equipped emblems.
Wrong emblem sizes void warranties and look unprofessional. Ford uses different emblem dimensions across model years, and even small mismatches create visible gaps or overhang. Measure your existing emblem or check online size charts for your specific year and model before ordering vinyl or cutting custom designs.
Pro Tip: Remove emblems with a heat gun and fishing line instead of prying tools. Warm the emblem for 30 seconds to soften adhesive, then slide fishing line behind it and work slowly. This prevents paint chips and panel dents.
Best practices to avoid damage:
- Always work in a ventilated area when using acetone or spray paint
- Test paint colors on a hidden area or scrap piece first
- Apply vinyl in the shade to prevent premature adhesive activation
- Use plastic tools only, never metal, to avoid scratching emblems
- Check benefits of emblem customization before starting to ensure your method aligns with your goals
Expected results and maintaining your customized emblem
A properly painted emblem shows smooth, even color with no brush marks or drips. The Envirotex resin creates a glass-like finish that reflects light uniformly. Edges should be crisp where chrome meets painted areas, with no bleed or overspray. If you see texture or unevenness, sand lightly with 2000-grit wet sandpaper and apply another resin coat.
Vinyl overlays produce a bubble-free surface that follows emblem contours perfectly. The vinyl should extend to emblem edges without gaps or overhang. Colors appear vibrant and uniform, with no wrinkles or lifted corners. If edges lift within the first week, reheat and press them down. Persistent lifting indicates inadequate surface prep, so remove the overlay, clean again with alcohol, and reapply.
Vinyl overlays last 5-7 years outdoors when maintained properly. Painted emblems sealed with resin remain vibrant indefinitely unless physically damaged. Both methods resist normal weather exposure, but painted emblems handle rock chips better due to the resin's hardness. Vinyl may show edge wear in harsh climates after several years.
Maintain your custom emblem with gentle cleaning:
- Wash with pH-neutral car soap and a soft microfiber cloth
- Avoid automatic car washes with harsh brushes that catch vinyl edges
- Never use abrasive cleaners, acetone, or solvent-based products
- Dry thoroughly after washing to prevent water spots
- Inspect edges monthly and reheat vinyl if lifting begins
Pro Tip: Apply a thin coat of spray wax over vinyl overlays every three months to protect against UV fading and maintain gloss. Wipe off excess immediately to prevent buildup around edges.
For painted emblems, monitor the resin surface for chips or cracks. Small chips can be filled with additional resin, mixed and applied with a toothpick. Larger damage requires stripping and repainting. Store touch-up paint in a cool, dark place for future repairs.
Seasonal care extends emblem life. In winter, remove road salt promptly to prevent corrosion under vinyl edges. In summer, park in shade when possible to reduce UV exposure. Maintaining vinyl emblem overlays involves simple habits that preserve appearance and adhesion for the full lifespan.
Explore professional Ford emblem overlays for quick customization
If DIY methods feel overwhelming or you want guaranteed results without the learning curve, ready-made emblem overlays deliver professional quality instantly. These precision-cut vinyl designs fit your specific Ford model perfectly, eliminating measuring and cutting errors. You simply clean the emblem, peel, and stick.
Professional overlays protect your original emblem while adding unique style. Hundreds of designs, including state flags and custom graphics, let you express personality without permanent modifications. When you're ready for a change, peel off the overlay and your factory emblem remains untouched.
Visit Emblem overlays to browse designs for your Ford model. Each overlay is handmade for precise fit and long-lasting adhesion. Order online and install in minutes, with no special tools or skills required.
FAQ
Can I customize my Ford emblem without removing it?
Yes, vinyl overlays allow customization without removing the emblem, preserving factory installation and avoiding potential damage. Clean the emblem surface thoroughly with rubbing alcohol, let it dry, then apply the vinyl overlay directly over the factory emblem. This method works best for flat or slightly curved emblems. Check types of Ford emblem overlays to find options that fit your emblem shape.
Are painted emblems reversible?
Painting provides a permanent look but damages original paint layers when removed, making full reversal nearly impossible. Acetone stripping and resin sealing alter the emblem surface permanently. If you want the option to return to factory appearance, choose vinyl overlays instead. Painted emblems require replacement with OEM parts to restore original look.
How do I know if my Ford emblem has sensors?
Newer Ford models, especially 2021+ F150 trucks, may have radar or camera sensors behind emblems for adaptive cruise control and collision avoidance. Check your owner's manual for active safety system details, or consult a dealership service department. Look for small camera lenses or mesh patterns on the emblem face. If sensors are present, use transparent vinyl overlays or avoid modifications that block sensor signals.
What is the best temperature to apply vinyl overlays?
Apply vinyl overlays at ambient temperatures between 65-75°F in the shade for optimal adhesion and workability. Cold temperatures make vinyl stiff and difficult to conform to curves, while excessive heat activates adhesive prematurely and causes stretching. Avoid wet installs or applying overlays in direct sunlight. If working in cooler weather, warm the vinyl and emblem slightly with a hairdryer before application.